
Dead batteries can ruin your day and leave you stranded. A portable jump starter is a handy tool that starts your car without needing another vehicle. This guide will teach you how to use a portable jump starter step by step, making the process safe and simple.
Keep reading, and get back on the road in no time!
Key Takeaways
- A portable jump starter helps start your car without another vehicle. Keep it fully charged and stored in a cool, safe place.
- Always attach the red clamp to the positive terminal (+) first and the black clamp to metal or the negative terminal (-). Follow safety steps to avoid sparks or damage.
- Clean corroded battery terminals with a wire brush before use for better connections. Check clamps and cables for damage regularly.
- Recharge your jump starter immediately after use and monthly if unused to maintain performance, especially for lithium-ion models.
- If the car doesn’t start, wait 1–2 minutes before retrying, then disconnect clamps in reverse order (black first). Seek help if problems persist.
Preparing to Use a Portable Jump Starter

Check your jump starter for a full charge and make sure it’s ready to go. Inspect the car battery, looking for loose cables or cracks that might cause trouble.


Inspecting the jump starter and vehicle battery
Always check the jump starter for visible damage or wear. Inspect its cables and clamps to confirm they aren’t frayed, cracked, or loose. Damaged parts can cause sparks or poor connections, so replace them before use.
Look at the car battery terminals too. If you see rust or corrosion, clean it off gently using a wire brush. “A clean connection is a strong connection,” as many auto experts say. Also, keep your jump starter stored in a cool place and away from flammable materials to avoid accidents later on!

- Widely Used: 4 in 1 Car Battery Cleaning Brush can quickly wash steel parts,machinery,paint stains and will not dam…
- Convenient design: This cleaning brush is lightweight and mini,making it easy to store. The compact handle provides…
- Multifunctional Washing: Using this 4 in 1 Car Battery Cleaning Brush can effectively remove dust and acid and alka…
- Premium Quality Durable Material: Our 4 in 1 Car Battery Cleaning Brush the material of the brush part is selected …
Ensuring proper charge levels
Check the charge indicator before use to confirm enough power. A fully charged jump starter ensures reliable performance.
Ensure that the jump starter displays the crank’s best charge level indicator before attempting to jump-start a vehicle.
Recharge the battery after each use, even if it seems fine. If left unused for an extended period, recharge it monthly. Lithium-ion models work best with consistent charging and monitoring.
Booster lead-acid models also need regular monitoring and proper battery charging.
Let it cool before recharging if it’s hot from recent usage.
Safety Precautions
Stay safe by following simple steps before using your jump starter. Small mistakes, like wrong connections or sparks, can cause big problems.
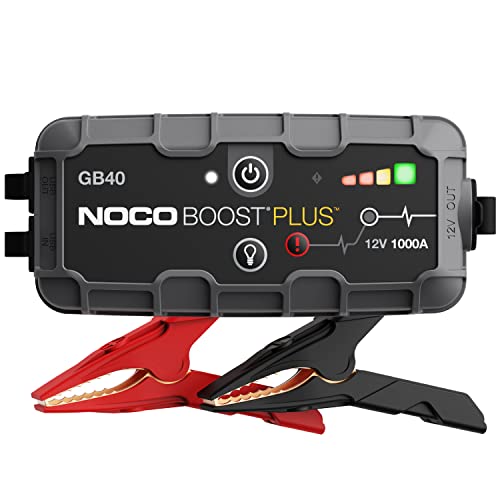
- START DEAD BATTERIES — Instantly start dead batteries with 1000 amps of peak lithium power. Up to 20 starts per cha…
- ULTRASAFE TECHNOLOGY — Engineered with patented spark-proof and reverse polarity protection for foolproof connectio…
- PORTABLE POWER BANK — Integrated power bank delivers emergency power to smartphones, tablets, and more. Recharges i…
- INTEGRATED LED FLASHLIGHT — Precision-engineered 100-lumen LED with 7 light modes, including SOS and strobe. Illumi…
Avoiding sparks and incorrect connections
- Always read the owner’s manual before use. It provides specific instructions for your device.
- Inspect the battery and clamps. Look for dirt, corrosion, or damage before connecting anything.
- Attach the red clamp to the positive terminal first. The positive terminal usually has a plus sign (+).
- Connect the black clamp to a metal frame or the unpainted surface of your car. Do not attach it directly to the negative battery terminal.
- Double-check that all clamps are tight and secure on their connections.
- Make sure the jump starter is off before attaching clamps, and only turn it on once all connections are secured.
- Avoid letting clamps touch each other during setup; this may cause sparks or short circuits.
- Disconnect in reverse order after starting your car. Remove the black (negative) clamp first, then remove the red (positive) clamp last.
- Keep jump starters away from moving engine parts while active.
- Never charge or adjust connections if you see smoke, sparks, or strong odors from either device or battery.
Ensure that clamps and cables are connected properly to maximize performance.
By following these steps closely, you help prevent accidents and keep everything in good condition!
Step-by-Step Guide to Using a Jump Starter

Get your car running again with this easy guide, so grab your jumper cables and let’s get started!
Connecting the clamps to the battery terminals
Attach the red clamp to the positive terminal (marked with a + or POS) of your car’s battery. Clip it tightly, so it doesn’t slip off during use. Next, connect the black clamp to the negative terminal (marked with a – or NEG).
If you can’t find the negative terminal, secure the black clamp to an unpainted metal surface on your car’s frame.
Keep clamps apart while connecting them. Make sure they don’t touch each other; this prevents sparks or damage. Confirm both clamps are snugly in place before powering on your jump starter.
Ensure that the car charge stays constant while you connect the clamps.
Always check that your jump starter is off beforehand for safety!
Powering on the jump starter

Switch on the jump starter after connecting it properly. Some models have a “power,” “charge,” or “boost” button. Press it to activate the output. Check for an indicator light signaling it’s ready.
Without this, starting the car can fail.
Keep the device away from moving parts like belts or fans. Low power level? Recharge before use. If it overheats, let it cool down first. Always follow your model’s manual for precise instructions!
Verify that the starter works correctly after each type of power cycle.
Starting the vehicle
Crank the engine right after turning on the jump starter. If the car doesn’t start, wait 1–2 minutes before trying again. This prevents overheating and protects your battery-powered device.
If the engine still won’t battery’s, check the positive jump-start connection and the black ignition contact. If problems persist, consult another manual or connect with roadside assistance.
Once the engine runs, turn off the jump starter first. Then remove clamps, starting with the black clamp (negative), followed by the red one (positive). Never drive while it’s still connected! Recharge your lithium-ion or lead-acid charger indoors afterward for future use.
Troubleshooting Common Issues
Jump starter not working
If the jump starter isn’t working, check its charge level first. A low battery can stop it from powering your vehicle. Make sure the power switch is on, and inspect indicator lights to confirm clamps are attached properly.
The red clamp must connect to the positive terminal, while the black one goes to the negative or the car chassis.
Dirty terminals could also cause trouble. Clean off corrosion before trying again. If everything looks right but fails to work, let the device cool down if it’s hot. Recharge it fully and wait 30 minutes before reusing it.
Some models require pressing a “boost” button for power delivery—don’t skip this step! If all else fails, contact customer support or seek roadside assistance instead of guessing further fixes.
If the jump starter still won’t start the battery after checking the charge indicator, inspect the positive jump-starter’s connection, and verify that all cables are properly connected. Also, check your battery charger and alternator for proper function.
Battery not charging
Check the wall outlet first. A faulty outlet or loose connection can stop charging. Verify that your charger matches the jump starter model for proper compatibility.
Let the device cool if it feels overheated during charging, as heat affects performance. Charge it monthly, even if not used, to keep its battery healthy. Store it in a cool, dry place to avoid long-term issues with battery storage and charging reliability.
Verify that your battery charger supports Li-ion and that there is sufficient checking of the charging settings for steady battery charging.
Conclusion
Using a portable jump starter is easier than you think. With the right steps and patience, you can get your car running again in no time. Be sure to follow the instructions, handle clamps carefully, and keep your jump starter charged.
It’s like having a tiny hero for your battery troubles! Keep one handy, and you’ll always feel prepared!
This guide also explains how starters work and shows the role of battery chargers in maintaining a proper car charge.
FAQs
Q: What is a portable jump starter, and how does it work?
Q: How do I use a jump starter to start my car?
Q: Can I use a portable jump starter as a power bank?
Q: Why won’t my car start even after using a jump starter?
Q: How do I avoid overcharging my battery while using a charger?
Q: Are there safety tips for using portable starters effectively?
Affiliate Disclosure: This post contains affiliate links. As an Amazon Associate, I earn from qualifying purchases—at no extra cost to you.
Disclosure: This guide is for informational purposes only and is not a substitute for professional advice. Cite Source: Google Content Quality Guidelines & Google Helpful Content Guidelines Summary.


